Showing posts with label CIFS. Show all posts

Monday, September 15, 2014

Business Problems: Leveraging UNIX-enabled AD Groups and Kerberos to Control Unix/Linux/Mac Access to a Windows Share

Background

In the previous post we discussed how to leverage the Kerberized environment provided by Centrify's UNIX/Linux client and the computer's AD account to access a read-only Windows (CIFS) share. By leveraging Kerberos, the mount command (or filesystems table) does not have to use a cleartext password.

Windows (CIFS) shares are all over the Enterprise (for files and printers) and most likely a read-only share is not a very practical example, however, a departmental share that is used by a workgroup to share files is much more common.  This time, we will implement an example.

The Marketing Share

In our mock example we have a share in APP1 set for the Marketing department.  Both Elaine and J.Peterman are members of this department, however they consistently access these shares from OS X, Unix and Windows machines.  Today a Marketing Share Access AD group is used to control access by way of memberships.

Requirements:


  • Marketing users should have the ability to exchange files (read/write)
  • The current heterogeneous environment consists of Windows, Mac OS X and UNIX/Linux stations
  • Users should be able to access the information from any type of platform
  • Controlling access to the Windows share should not deviate from the current process.
  • Users should alingn with the security policy and don't use cleartext passwords when mounting CIFS shares.

Challenges:

  • This would not be an issue in a homogeneous environment
  • Identity is key, UNIX identities should be uniform across platforms (for users and groups)
  • Users should not have access to the root account to use the mount command

The Proposed Solution:

  • Centrify the non-Windows platforms  (Mac OS X, Unix/Linux) - this provides the AD Integration, Kerberos environment and Privilege Elevation
  • Leverage a common UID/GID scheme by leveraging Zones and the Autozone
  • UNIX-enable the Matkeing Share Access AD group.
  • On UNIX Platforms, allow the Marketing users to use the mount command with privileges


Video Labs

Lab Part I - Initial Setup (13.30 min):  https://www.youtube.com/watch?v=flp4L200o4c 
Lab Part II - Verification (11 min):  https://www.youtube.com/watch?v=M-fdtZeYYtk 

Elaine's mount command (CentOS 6.5):
dzdo mount -t cifs //app1.corp.contoso.com/marketing /mnt/share -o sec=krb5,user=elaine.benes,uid=1149240407,gid=99998,group=marketing-share-access,umask=0002,file_mode=0775,dir_mode=0755 --verbose
Share Permissions:
(this can be improved since the rest of the world would get read access given that ACL)
Marketing Share - Permissions.jpg
NTFS Permissions:
Marketing NTFS - Permissions.jpg
Role created for Marketing Users
Marketing - mount command.jpg

We can improve on this by using Automount to access the user's Windows home.

Sunday, September 14, 2014

Security Corner: Eliminating Cleartext Password Usage in Scripts and Facilities

Background

In the previous post "What is a Kerberos Keytab and why should I use it?"  we discussed that once you have a Centrified system, Kerberos-enabled applications can leverage this authentication mechanism.  The key benefit being that the Centrify agent (adclient) automatically maintains the Kerberos environment (e.g machine keytabs and krb5.conf files are updated based on the AD sites and services info) and both the OS and Centrify offer an array of "Kerberized" apps to help the most seasoned Sysadmins.

In this post I will discuss some popular use cases:
  • Using the Centrify DNS utility (addns) to leverage Active Directory DNS Dynamic Updates
  • Eliminating cleartext passwords from the mount command or from /etc/fstab

Using AD DNS Dynamic Updates and addns to keep your DNS entries up to date


One of the coolest Centrify tools is addns.  As discussed in an earlier post, this utility can help in performing dynamic or manual updates to DNS registrations for Centrified systems.  Think about the "ipconfig /registerdns"  command on Windows.  This is very useful especially when servers are being built with static IP addresses an in a Mixed UNIX/Linux and Windows environment. 

How does it work?

As per TechNet:  "Domain Name System (DNS) client computers can use dynamic update to register and dynamically update their resource records with a DNS server whenever changes occur. This reduces the need for manual administration of zone records, especially for clients that frequently move or change locations and use Dynamic Host Configuration Protocol (DHCP) to obtain an IP address.

Dynamic updates can be secure or nonsecure. DNS update security is available only for zones that are integrated into Active Directory Domain Services (AD DS). After you directory-integrate a zone, access control list (ACL) editing features are available in DNS Manager so that you can add or remove users or groups from the ACL for a specified zone or resource record."


This means that in cases in which there are workstations (like Macs or Linux) that change networks frequently or when servers are being provisioned and there's no available Windows DNS administrator, addns can be a very useful tool.

The addns utility supports the -m (or --machine) switch, this means that instead of providing a valid AD account to update the DNS records for a computer, you can use the computer account's credentials instead.  The key benefit here is that there's no need to type credentials.

[root@engcen7 ~]# cat /etc/redhat-release
CentOS Linux release 7.0.1406 (Core)
[root@engcen7 ~]# adinfo -v
adinfo (CentrifyDC 5.2.0-218)
[root@engcen7 ~]# addns -U -m
Updating host records for engcen7.centrifyimage.vms on 192.168.81.10.
Updated host records engcen7.centrifyimage.vms.
Updating reverse lookup records for engcen7.centrifyimage.vms on dc.centrifyimage.vms.
Updated reverse lookup record 167.81.168.192.in-addr.arpa.

Alternatively, if you know the credentials of an AD DNS administrator (or have a keytab), you can kinit and launch addns without the need to specify the --user (or -u) switch:

[root@engcen7 ~]# /usr/share/centrifydc/kerberos/bin/kinit dwirth
Password for dwirth@CENTRIFYIMAGE.VMS:
[root@engcen7 ~]# addns -U
Updating host records for engcen7.centrifyimage.vms on 192.168.81.10.
Updated host records engcen7.centrifyimage.vms.
Updating reverse lookup records for engcen7.centrifyimage.vms on dc.centrifyimage.vms.
Updated reverse lookup record  167.81.168.192.in-addr.arpa.

Potential Uses:
  • Troubleshooting DNS connectivity for a roaming computer (Linux or Mac)
  • Automated provisioning of IP addresses during Server provisioning.
Keep in mind, all the Centrify "ad" tools that take the -u (--user) option are Kerberized, including adjoin, adleave, addns, adcert, adsmb, adkeytab, etc;  so your scripts don't require interactive attention or the use of cleartext passwords!


Eliminate Cleartext Passwords from the Mount Command or the filesystems table

The mount command traditionally lends itself for the use of cleartext passwords.  Although Centrify has nothing to do with this command (there's a great degree of variability based on the distribution);  the key continues to be Kerberos.

Let's pick on this example.  The idea is to use the mount command from a Unix or Linux system to mount a CIFS share that is on a NAS device or Windows Share.


Both the Mount Syntax
# mount -t cifs //ntserver/download -o username=vivek,password=myPassword /mnt/ntserver
and the fstab entry
//ntserver/docs /mnt/samba      smbfs   username=docsadm,password=D1Y4x9sw 0 0
specify the use of a cleartext password.  Let's improve on this example by leveraging a Centrified system in the modified Microsoft Test Lab Guide.  The idea is to leverage the AD Kerberos environment, the Centrify client, the machine account and the user account to eliminate the use of the cleartext password.

Using the Machine Account to access a Read-only Share

On APP1 - Assign permissions to the Unix/Linux system
  1. Open Windows Explorer and go to the root of the C: drive.
  2. Create a new folder and call it 'mysmb'
  3. Right-click the folder > Properties > Sharing > Advanced Sharing > Permissions and set:
    Authenticated Users :  Read
    Domain Admins :  Full Control
  4. Right-click the folder > Properties > Security > Edit > and Add
    Select Type: Computers
    CEN1$ (or your centrified system) : Read
  5. Create a a text file in the folder (myfile.txt) and put some text in it.
On CEN1 (or your Centrified system) - Test your mount
Note: Make sure the cifs-utils package is installed on RHEL derivatives.
  1. Log on with a user that has the ability to elevate.
  2. Use the following command:
    mount -t cifs //app1.corp.contoso.com/mysmb //mnt/share -o sec=krb5
  3. Test your share.
    This mapping is done right without the need of cleartext passwords.
The active session comes from the Linux computer.

Because the mapping has been done with the Kerberos ticket of the machine account and typically per policy, these only last 10 hours;  a mechanism to renew the ticket for the lifetime of the mount has to be implemented.  For example, a cron job that renews the ticket before it expires like this:

Runs every day at midnight, 8AM and 4PM.  This assures there’s a fresh ticket every 8 hours.

# crontab -l
01 00 * * * /usr/share/centrifydc/kerberos/bin/kinit -k cen1$
01 08 * * * /usr/share/centrifydc/kerberos/bin/kinit -k cen1$
01 16 * * * /usr/share/centrifydc/kerberos/bin/kinit -k cen1$

Or you can leverage the Set Crontab Entries GPO.

Crontab entries can be controled using Group Policy

In addition, and in support of Hadoop, Centrify has come up with another set of GPOs to help with Kerberos ticket renewal.  This parameter can be specified in the configuration file or via GPOs:

Infinite ticket renewal GPOs
This sets up the building blocks for our next entry.  Leveraging UNIX-enabled AD groups to control access to a Windows share leveraging Centrify.

Monday, July 7, 2014

Labs: Securing Multi-protocol File Access (NFS/CIFS) on NAS (NetApp) Using Centrify and Windows Security Groups

Background

In the previous post, we discussed how to overcome identity limitations in NAS sharing scenarios.  In heterogeneous environments the main issue is about Identity - the filer is unable to consistently translate the Windows identity to a UNIX identity.  With Centrify Zones and the LDAP Proxy we solved the issue providing a unified identity consistently across Windows, Unix, Linux and Macs.

In Summary, here's what we accomplished:


The LDAP Proxy present's user information for the filer with consistency.  The UNIX information corresponds to what the AD user has in the Centrify Zone.

Now, we can let the NetApp filer do it's magic.  Let's look at a very simple example:

Testing Mixed Share Permissions

Set up the NetApp share
  1. Create a new qtree
    qtree create /vol/vol0/mixed
  2. Change the security model as mixed
    qtree security mixed
  3. Export the newly created qtree
    exportfs -p rw /vol/vol0/mixed
Create a New AD Security Group for the Mixed Share Access
  1. Open ADUC browse to an OU for groups
  2. Select New > Group
  3. Give it a name  (e.g. "Mixed-Share-Access")
  4. Add a test user to the newly created share.
Publish the share in Windows
    1. Open Computer Managemetnt
    2. Connect to your NetApp filer
    3. Navigate to System Tools > Shared folders
    4. Follow the wizard to create your share
    5. In the Share Permissions, remove Everyone and add your previously-created AD Group

Now you have:
  • A CIFS share that is a shared folder protected by a Security Group in AD.  Access is governed by group membership and the permissions on the share.  NTFS permissions will be assigned at file/folder creation based on the user's identity.
  • An NFS share that can be mounted from any Unix, Linux or Mac system;  UNIX file permissions will be assigned at folder/file creation based on the user's identity.  We'll leverage the NETGROUPS option with Centrify-exposed options to accomplish this.
Let's see this in action


Improvements

As outlined in the latter part of the video, there's definitely improvements that can be implemented:
  • On the NetApp side, Kerberos can be implemented for additional security.  Remember that Centrify already provides "hands-off" Kerberos environment optimized for Microsoft's Kerberos.
  • The AD Group used to control access can be UNIX-enabled, this opens the possibility of leveraging the group's UNIX identity as a group owner on the UNIX side.

Key benefits

  • Process consolidation - now a single AD group can be leveraged to control access.
  • Better Security - there's a better grasp on who has access to what.

Saturday, July 5, 2014

Business Problems: Conquering the NAS multiprotocol (CIFS/NFS) file sharing in a mixed (Unix, Linux, Windows, Mac) environment using Centrify

Background

Network Attached Storage (NAS) is a key part of any enterprise today; they provide flexibility and an abstraction layer from an infrastructure perspective.  In the heterogeneous enterprise, the easy part is the infrastructure piece;  the hard part has to do with the diversity of platforms and the multiple file-sharing protocols in use.  This post and a series of labs will illustrate how leveraging Active Directory, Centrify Zones, the Centrify agent for UNIX, Linux & Mac and the Centrify LDAP Proxy we can ensure consistency with multi-protocol CIFS/NFS shares and enhance operational efficiency.

In previous posts, we have addressed how to to solve the consistency issue individually:


This posts uses a NetApp filer as an example(*).  The concepts outlined here can be used on any NAS device that supports LDAP.  We will assume that you understand that the fundamental problem is how to solve the issue of identity across multiple platforms and how we accomplish that with the Centrify Agent and Active Directory (I highly recommend that you read the previous links).

The Issues (or variations of it)

  • We have a NAS device, we integrated it with AD and it works great as long as the user is performing file operations on Windows.  However, we have to keep separate NFS shares.  We also have to manage permissions in multiple groups (Windows or UNIX) and that takes a lot of effort.
    Note, in my example with NetApp, the appliance does a great job at discovering LDAP servers:

    netapp1> Sat Jul  5 11:26:52 EST [netapp1:auth.ldap.trace.LDAPConnection.statusMsg:info]: AUTH: TraceLDAPServer- AD LDAP server address discovery for CORP.CONTOSO.COM complete. 2 unique addresses found.

    However, although it can resolve the AD portion, it is plain wrong about the Unix UID:
  • We have a multi-protocol share (CIFS/NFS), everything is great on Windows, when the user wants to access their files over NFS he has to call to have the file/folder ownership taken care of
  • We are tired of having to resolve file ownership issues.  Our organization is globally very diverse and each time we have a new visitor we spend significant amount of time helping them get access.
  • We have a combination of Unix, Linux, Mac and Windows users and although we had it down in individual servers, when we moved to filers now we have all these new issues.
  • I have a filer in my environment and we have Centrify as well, I know it can help but I don't now where to start.

Example of one of the issues

Let's look at an example.  In my environment with a domain-joined Netapp the appliance does a great job at discovering LDAP servers (this happened once I searched for one of my users):

netapp1> Sat Jul  5 11:26:52 EST [netapp1:auth.ldap.trace.LDAPConnection.statusMsg:info]: AUTH: TraceLDAPServer- AD LDAP server address discovery for CORP.CONTOSO.COM complete. 2 unique addresses found.

netapp1> wcc -s george.constanza
(NT - UNIX) account name(s):  (CORP\george.constanza - pcuser)
        ***************
        UNIX uid = 65534

        NT membership
                CORP\george.constanza
                CORP\UNIX-Model-Samba Users
                CORP\UNIX-Model-All Users
                CORP\UNIX-Model-dbaadmin
                CORP\Domain Users
                CORP\UNIX-Model-Sysadmins
                CORP\UNIX-Model-webadmin
                CORP\UNIX-Model-All UNIX Groups
                BUILTIN\Users
        User is also a member of Everyone, Network Users,
        Authenticated Users
        ***************

This is great from a Windows perspective, however, look at the Unix UID (65534), when you look at the options, this means that the user is being assigned a "nobody" user from a UNIX perspective.  We can further confirm this with this command:

netapp1> wcc -u george.constanza
no passwd entry for george.constanza

The way I have my system configured, although I can derive the user's identity leveraging the DCs, I can't see the user's Unix identity.  It is stored in the zone. See the output from a centrified system:

george@ubu1:/etc/centrifydc/openldap$ adquery user george.constanza -A
unixname:george
uid:1149240406
gid:1149240406
gecos:George Constanza
home:/home/george
shell:/bin/bash
auditLevel:AuditIfPossible
isAlwaysPermitLogin:false
dn:CN=George Constanza,OU=Staff,DC=corp,DC=contoso,DC=com
samAccountName:george.constanza
displayName:George Constanza
sid:S-1-5-21-2180375406-786980114-1643973036-1110
userPrincipalName:george.constanza@corp.contoso.com
canonicalName:corp.contoso.com/Staff/George Constanza
passwordHash:x
accountExpires:Never
passwordExpires:Wed Aug 13 11:28:48 2014
passwordWillExpire:39
nextPasswordChange:Thu Jul  3 11:28:48 2014
lastPasswordChange:Wed Jul  2 11:28:48 2014
accountLocked:false
accountDisabled:false
zoneEnabled:true
unixGroups:dbaadmin,george,webadmin
memberOf:corp.contoso.com/UNIX/Provisioning/UNIX-Model-All UNIX Groups,corp.contoso.com/UNIX/Provisioning/UNIX-Model-All Users,corp.contoso.com/UNIX/RBAC/UNIX-Model-Samba Users,corp.contoso.com/UNIX/RBAC/UNIX-Model-Sysadmins,corp.contoso.com/UNIX/UNIX Groups/UNIX-Model-dbaadmin,corp.contoso.com/UNIX/UNIX Groups/UNIX-Model-webadmin,corp.contoso.com/Users/Domain Users

Our goal is to make sure that our filer (or application) gets the correct Identity information for the purposes of proper file/folder ownership, access and permissions.


Who's affected

As you can see, the variety of problems outlines have multiple constituents:
  • Security needs to make sure that users have access to what they need and to comply with policies
  • IT (business) need to make sure that users can do their jobs
  • IT (operations) wants to be efficient and make sure that an army of people is not needed
  • The End User just wants to get their job done
As with all Business Problems, we'll use the Plan, Do, Check, Adjust methodology.

Planning

As discussed in previous posts, the key to this issue is Identity.  In this case, the NAS appliance needs to know not only the user's AD information, but the extended attributes (RFC2307) like unixname, UID, GID, Home, GECOS, Shell, etc., and unlike other approaches, Centrify stores this information in the zone.  This makes the solution more flexible because an AD principal can have multiple Unix identities.

Note:  If you've read this blog, you know that I've been very vocal about overrides (what enables multiple identities and roles).  Every process needs to have constraints; constraints make solutions simpler.  Having a normalized UNIX namespace is the goal and destination of any enterprise, even if Centrify allows you to put off this goal.  

Identity and Access Planning
  1. Do the best you can to have a normalized namespace.  Leverage Centrify's ability to assign users a unique UID by generating it from the AD SID (using Centrify or Apple's Scheme).
  2. Perform a migration if necessary (this post talks about strategies and Centrify tools for that purpose)
  3. Leverage the power of hierarchical zones:  provision all identities at the top-most zone.  This will ensure that all pertinent systems will know the user's identities.
  4. Continue to enforce the least-access principle:  Use the "listed" role to make users known to the systems (e.g. the LDAP proxies) and ensure that they can't sign-in to the systems.
Planning your LDAP Proxies

The Centrify LDAP proxy leverages the Centrify client (adclient) to present AD information to clientless devices or programs.  The benefits of leveraging the proxy are:
  • It flattens AD for the application:  depending on the enterprise, AD can be complex.  There may be multiple forests, child domains, one-way, two-way trusts, etc.
  • It leverages the agent's built-in capabilities:  optimal DC selection, site-awareness and offline cache.
Plan for high-availability:  the NAS (or application) is going to require redundancy, plan to deploy and configure multiple proxies.
Plan for confidentiality:  make sure that only authenticated connections over secure transports (TLS, SSL, etc) in case your appliance or application does not do it natively.
Plan for high-performance:  As always, have NSCD on the Centrified system, and plan for co-location near the appliance, application and be close to Global Catalog servers in complex environments.

Plan for your file-sharing use case

This section varies based on what you want to accomplish.  Planning for home directories is not the same as planning for a workgroup share.  

Implement (Do)

  1. Unix-enable all your relevant users (you don't need to Unix-enable users that won't ever access via NFS).  You can do this manually, with ZPA or with your own IdM solution.   
  2. Assign roles as required:  keep the least-access principle intact by leveraging the "listed" role.
  3. Install the LDAP Proxy(es):
    1. Copy the Centrify LDAP proxy binaries to the platfrom.
      e.g. for Ubuntu on 2014:  centrifydc-ldapproxy-5.1.3-deb5-x86_64.deb
    2. Log in and install the package
      e.g. dpkg - i centrifydc-ldapproxy-5.1.3-deb5-x86_64.deb
      The LDAP proxy binary is on /usr/share/centrifydc/libexec
      The config files and schemas are in /etc/centrifydc/openldap
      The LDAP utilities (like ldapsearch)  are on /usr/share/centrifydc/bin
    3. Modify the RFC 2307 map
      1. Edit the /etc/centrifydc/openldap/rfc2307.map file
      2. Add the following line (for NetApp compatibility):
        # Added for NetApp
        posixAccount.userPassword: _userPassword
    4. For testing only, start slapd manually:
      dzdo /usr/share/centrifydc/libexec/slapd -f /etc/centrifydc/openldap/ldapproxy.slapd.conf -h ldap://ubu1.corp.contoso.com
    5. Check that the proxy is running
      $ ps -ef | grep slapd
      root     23192     1  0 Jul04 ?        00:00:00 ./slapd -f /etc/centrifydc/openldap/ldapproxy.slapd.conf -h ldap://ubu1.corp.contoso.com
    6. Verify that the proxy is responding to queries (e.g. check the Administrator account)
      $ /usr/share/centrifydc/bin/ldapsearch -h ubu1.corp.contoso.com-x -b "dc=corp,dc=contoso,dc=com" "(cn=Administrator)"
      # extended LDIF
      #
      # LDAPv3
      # base <dc=corp,dc=contoso,dc=com> with scope sub
      # filter: (cn=Administrator)
      # requesting: ALL
      # with pagedResults control: size=100
      #
      # Administrator, Users, corp.contoso.comdn: cn=Administrator,cn=Users,dc=corp,dc=contoso,dc=comaccountExpires: 0
      (output truncated***)
  4. Configure your NAS appliance (e.g. on NetApp Ontap v 8.1.2)
    1. Housekeeping:  Make sure that the name of the appliance is resolvable (add an A record for it) and that all Centrified systems, Windows Systems can resolve it.  The NetApp system should resolve all systems as well.  E.g.
      netapp1> ping ubu1
      ubu1.corp.contoso.com is alive
      netapp1> options dns
      dns.cache.enable             on
      dns.domainname               corp.contoso.com
      dns.enable                   on
      dns.update.enable            off
      dns.update.ttl               24h
    2. Housekeeping:  Make sure that CIFS and NFS are licensed, enabled and the NetApp filer is joined to the domain.  (use the license command, the cifs setup command )
    3. Verify that there's a computer object for the netapp device and that you can (as a Domain Admin) connect to it via Computer Management.  E.g. using ldapsearch:
      george@ubu1:/etc/centrifydc/openldap$ /usr/share/centrifydc/bin/ldapsearch -h
      ubu1.corp.contoso.com -x -b "dc=corp,dc=contoso,dc=com" "(cn=NETAPP1)"
      <truncated>
      # NETAPP1, Appliances, corp.contoso.com
      dn: cn=NETAPP1,ou=Appliances,dc=corp,dc=contoso,dc=com
      <truncated>
    4. Optional:  Make sure that Domain Administrators are not mapped to root the NetApp filer:
      netapp1> options wafl.nt_admin_priv_map_to_root off
    5. Configure NetApp to use the LDAP Proxy (Example corp.contoso.com;  ubu1)
      1. Set up the LDAP base container
        netapp1> options ldap.base dc=corp,dc=contoso,dc=com
      2. Set up the LDAP server(s) to be used by the NetApp appliance
        netapp1> options ldap.servers ubu1.corp.contoso.com
      3. Set up the name of the Active Directory Domain
        netapp1> options ldap.ADdomain corp.contoso.com
      4. Map the userPassword attribute to avoid null results
        netapp1> options ldap.nssmap.attribute.userPassword cn
      5. Enable LDAP
        netapp1> options ldap.enable on
      6. Modify the /etc/nsswitch.conf to make LDAP the first source for user, group and shadow entries.
        netapp1> wrfile /etc/nsswitch.conf
        hosts:  files  dns
        passwd:  ldap files
        group: ldap files
        netgroup:  files nis
        shadow:  files nis
      7. Verify the results
        1. Query and note the UID from Windows
          wcc -s jerry.seinfeld 
        2. Query and note the UID from UNIX
          wcc -u jerry.seinfeld
        3. Advanced query using NSS
          priv set diag
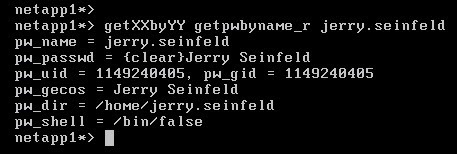
          getXXbyYY getpwbyname_r jerry.seinfeld


          Compare the results with the zone information.  At this point it should match the UNIX identity on Access Manager

Check the Results

To verify the results, use a multi-protocol (CIFS/NFS) share and make sure that the identity information is consistent.

  1. From a Windows system in the target domain, map or browse to the share via CIFS.  Create a file.
  2. From a Unix/Linux or Mac system, mount the share as an NFS mount and issue the ls -la and ls -lan.  Compare the results from before.

Adjustments to the Implementation

Adjustments are based on your existing environment, however, based on ours here are some key modifications:

  • There's only one LDAP proxy, we need several for high-availability
  • The LDAP Proxy is accepting anonymous connections, we need to make sure that only authenticated connections are accepted.
  • Ideally we would use Secure LDAP or implement TLS or IPSec for additional confidentiality controls.
  • Operations needs to monitor the health and status of the LDAP Proxies

Lab Videos


What you'll need to follow along:
  • Active Directory
  • Centrify Standard Edition
    • A Centrify zone
    • Client for Unix, Linux or Mac
    • Centrify's LDAP Proxy
  • A Multi-protocol filer (we'll use NetApp's  ONTAP Simulator)
Installing, Configuring and Testing the Centrify LDAP Proxy


Configuring the NetApp appliance to use the Centrify LDAP Proxy


Verifying the NetApp CIFS/NFS share provides consistent identities