This 15-minute video also features Centrify Privileged Service
Centrify can help challenges with Hadoop implementations for confidentiality and integration at the OS-level. No need to stand-up independent MIT Kerberos infrastructure, plus the strongest Access Controls to meet or exceed any security or regulatory requirement.

Implementing Identity and Access Management on Unix, Linux, SaaS and Mobile systems leveraging Active Directory and Centrify Platforms
Showing posts with label auditing. Show all posts
Showing posts with label auditing. Show all posts
Thursday, July 9, 2015

Sunday, December 15, 2013
Lab # 2: Extending the Base Configuration TLG with UNIX and Linux systems
Lab Overview
The platforms we'll be using in this guide are
Follow instructions for each corresponding platform:
Lab End State

- Install CentOS 6.4, SUSE 10 SP3 and Solaris 5.10
- Set up and verify the TCP/IP properties and SSH daemon on the UNIX/Linux systems.
- Modify the UNIX/Linux systems to skip the graphical desktop
- Verify or setup the Name Server Cache Daemon (NSCD) to start automatically
- Create and modify the corresponding user for each system and enable sudo on Linux systems:
We will create two users in all systems: centrifying and Jessie Matthews (jmatthews)
Two users in the Database System (CEN1); Jeremy Silva (jsilva) & Ramon Jimenez (rjimenez)
Two users in the Web System (SUSE1); Doyle Russell (drussell) & Matt Sims (msims)
The centrifying and jmatthews users will be added to the wheel group that will be sudo-enabled. - Test connectivity from CLIENT1 using PuTTY
- Copy the Centrify agents to each corresponding system
- The requirements of the base Test Lab Guide (for DC1, APP1 and CLIENT1)
- A Centos 6.5 VM for CEN1
http://wiki.centos.org/Download
You may need to download the NSCD package for CentOS. - A Novell SUSE 10 VM for SUSE
https://www.suse.com/LinuxPackages/packageRouter.jsp?product=server&version=10&service_pack=sp3&architecture=x86_64&package_name=index_all - A Solaris 5.10 VM for SOL1
http://www.oracle.com/technetwork/server-storage/solaris10/downloads/index.html
The platforms we'll be using in this guide are
- CentOS 6.4: will be assigned IP address 10.0.0.151
- Novell SUSE 10 will be assigned IP address 10.0.0.152
- Solaris 5.10 x86 will be assigned IP address 10.0.0.153
Follow instructions for each corresponding platform:
On CEN1
- Log in as a privileged user (or root) and open a terminal
- Verify that the NetworkManager (NM) service is running
service NetworkManager status
NetworkManager (pid ####) is running
Note: Follow the appropriate steps if you're not using NM - Edit the /etc/sysconfig/network and add:
HOSTNAME=cen1.corp.contoso.com - Copy the interface's MAC address: (Example eth0 with the Mac address 00.0c.29.2b.b7.ca)
ifconfig eth0 | grep HWaddr
eth0 Link encap: Ethernet HWaddr 00:0C:29:2B:B7:CA - Edit
(or create) the /etc/sysconfig/network-scripts/ifcfg-<interface>
and add (or edit) the following lines: (using above example and the
information about the lab)
DEVICE=eth0
NM_CONTROLLED=yes
ONBOOT=yes
HWADDR=00:0C:29:2B:B7:CA
IPADDR=10.0.0.151
NETMASK=255.255.255.0
DNS1=10.0.0.1 - Restart the network service:
service network restart - Verify the configuration (hostname, DNS configuration, ping test to crl.corp.contoso.com)
# hostname
cen1.corp.contoso.com
# cat /etc/resolv.conf (look for the two lines below)
search corp.contoso.com
nameserver 10.0.0.1
# ping crl
PING crl.corp.contoso.com (10.0.0.3) 56(84) bytes of data.
64 bytes crl.corp.contoso.com (10.0.0.3): icmp_seq=1 ttl=128 time=17.2 ms - This verifies that the TCP/IP configuration is correct and that CEN1 is using DC1 for DNS.
- To make sure that the SSH daemon is running, run
chkconfig | grep ssh - If the sshd service is off at runlevels 3 and 5, enable them with this command
chkconfig sshd on --level 35 - Install and enable the NSCD daemon:
rpm -Uvh nscd-2.12-1.132.el6.x86_64.rpm
chkconfig nscd on --level 35
service nscd start - Make sure that the SSH daemon configuration is set up for PAM and to allow Challenge Response. In the /etc/ssh/sshd_config file, make sure these lines are enabled:UsePAM yes
ChallengeResponseAuthentication yes
The opposite entries need to be commented, otherwise the last directive will be the effective setting. - Create an administrative user and the DBAs.useradd -m centrifying
useradd -m -c "Jeremy Silva" jsilva
useradd -m -c "Ramon Jimenez" rjimenez
useradd -m -c "Jesse Matthews" jmatthews - Add the administrative user (centrifying in my example) user to the wheel group
usermod -G wheel centrifying
usermod -G wheel jmatthews - Enable sudo in the system
vi /etc/sudoers
Uncomment the authenticated section for the wheel group
%wheel ALL=(ALL) ALL
Save the file.
On SUSE1
- Log in as a privileged user (or root) and open a terminal
- Edit the /etc/hostname file (create if it doesn't exist) and add the line
suse1 - Edit the /etc/hosts file. Make sure to add the hostname to the corresponding line:
127.0.0.1 localhost suse1 - Edit the /etc/resolv.conf file and add:
search corp.contoso.com
nameserver 10.0.0.1 - Edit
(or create) the /etc/sysconfig/network-scripts/ifcfg-eth-<MAC>
and add (or edit) the following lines: (using above example and the
information about the lab)
DEVICE=eth0
ONBOOT=yes
IPADDR=10.0.0.152
NETMASK=255.255.255.0 - Restart the network service:
service network restart - Verify the configuration (hostname, DNS configuration, ping test to crl.corp.contoso.com)
# hostname
suse1.corp.contoso.com
# cat /etc/resolv.conf (look for the two lines below)
search corp.contoso.com
nameserver 10.0.0.1
# ping crl
PING crl.corp.contoso.com (10.0.0.3) 56(84) bytes of data.
64 bytes crl.corp.contoso.com (10.0.0.3): icmp_seq=1 ttl=128 time=17.2 ms - This verifies that the TCP/IP configuration is correct and that SUSE1 is using DC1 for DNS.
- To make sure that the SSH daemon is running, run
chkconfig | grep ssh - If the sshd service is off at runlevels 3 and 5, enable them with this command
chkconfig sshd on --level 35 - Make sure that the NSCD daemon is running on levels 3 and 5chkconfig --list | grep nscdnscd 0:off 1:off 2:off 3:on 4:off 5:on 6:off
If the service is not set to run by default on levels 3 and 5, enable it:
chkconfig nscd on --level 35 - Make sure that the SSH daemon configuration is set up for PAM and to allow Challenge Response. In the /etc/ssh/sshd_config file, make sure these lines are enabled:
- UsePAM yes
ChallengeResponseAuthentication yes
The opposite entries need to be commented, otherwise the last directive will be the effective setting. - Create an administrative user and the Web Administratorsuseradd -m centrifying
useradd -m -c "Doyle Russell" drussell
useradd -m -c "Matt Simms" msimms
useradd -m -c "Jesse Matthews" jmatthews
Note: the useradd command is in the /usr/sbin folder in case you don't have it in your path. - Add the user to the wheel group
usermod -G wheel centrifying
usermod -G wheel jmatthews - Enable sudo in the system
vi /etc/sudoers
Uncomment the authenticated section for the wheel group
%wheel ALL=(ALL) ALL
Save the file.
On SOL1
In Solaris, you have to edit or review these files to change the configuration:
/etc/nodename
/etc/hostname.interface
/etc/inet/hosts
/etc/inet/ipnodes
/etc/inet/ipnodes
/etc/defaultdomain
/etc/netmasks
/etc/defaultrouter
/etc/resolv.conf
/etc/nsswitch.conf
We won't be configuring a default router for now.
- Log in as a privileged user (or root) and open a terminal
- If your computer is set up for DHCP, remove the /etc/dhcp.<interface> (example: e1000g0)
- Edit
the /etc/nodename and add this line
sol1 - Edit the /etc/hostname.<interface> file (e.g e1000g0 /etc/hostname.e1000g0)
sol1 - Edit
the /etc/inet/ipnodes file and add this line
10.0.0.153 sol1 - Edit
the /etc/inet/hosts file and add this line:
10.0.0.153 sol1
and also modify this line:
127.0.0.1 localhost.localdomain localhost sol1
- Edit the /etc/defaultdomain file (if it doesn't exist, create it), just write this line:
corp.contoso.com - Edit the /etc/netmasks file and add this line
10.0.0.0 255.255.255.0 - Edit the /etc/resolv.conf file and add:
search corp.contoso.com
nameserver 10.0.0.1 - Verify that the /etc/nsswitch.conf is configured to resolve hosts using dns (add if necessary)
cat /etc/nsswitch.conf | grep dns You should see results for hosts and ip nodes, if not, add these lines:
hosts: files dns
ipnodes: files dns - You may have to restart the server (if you changed the /etc/nsswitch.conf file or restart the network (svcadm restart physical).
- Verify the configuration (hostname, DNS configuration, ping test to crl.corp.contoso.com)
# hostname
sol1
# cat /etc/resolv.conf (look for the two lines below)
search corp.contoso.com
nameserver 10.0.0.1
# ping crl
crl is alive - This verifies that the TCP/IP configuration is correct and that SOL1 is using DC1 for DNS.
- Verify that the NSCD daemon is running$ svcs \*name-service-cache\*STATE STIME FMRIonline Dec_24 svc:/system/name-service-cache:default
- Create a couple of users useradd -m centrifying
useradd -m -c "Jesse Matthews" jmatthews
Modify the UNIX/Linux to skip the graphical interface
We don't need to run the platforms in graphical mode since these systems are purposed as servers.
On CEN1 and SUSE1
- Log in as a privileged user (or root) and open a terminal
- Edit the /etc/inittab
id:3:initdefault: - Reboot the server to start in Multi-user, server mode.
On SOL1
- Log in as a privileged user (or root) and open a terminal
- Disable the graphical interface
/usr/dt/bin/dtconfig -d - CDE or Java desktop have been disabled.
Test connectivity from CLIENT1 using PuTTY
- Log on to CLIENT1 with a domain user
- Open PuTTY and try to connect to the UNIX/Linux hosts.
- Optional: Create Saved Connections to each host.
Copy the Centrify agent to each system
- Open Windows Explorer and browse to \\APP1\Files
- From CLIENT1, open WinSCP
- Connect to CEN1. Create a temp folder in the root of the filesystem /
- Open /temp
- Drag the file centrify-suite-2013.3-rhel3-x86_64.tgz (from the \\APP1\Files explorer window) into the /temp window in WinSCP and click copy.
- Repeat the process for the next two files:
centrify-suite-2013.3-sol9-x86.tgz goes into /temp of SOL1
centrify-suite-2013.3-suse9-x86_64.tgz goes into /temp of SUSE1 - Log-off CLIENT1

Monday, December 9, 2013
Basic Concepts: UNIX and Linux Access Controls
Multiple Capabilities-Multiple Solutions
Traditionally UNIX and Linux have separate components for Directory Services, Name Resolution, Authentication, Privilege Management, Accounting and Configuration Management.
Note: I will be referring to the UNIX family of systems (Including Linux) as UNIX throughout this blog.

Directory Services on UNIX/Linux
UNIX Systems have been around for a long time. They have defined and built the Internet as we know it today, so we owe a lot of the benefits that we enjoy to the legacy of UNIX. With the birth of Linux, Open Source solutions and the penetration of virtualization technologies, the family of UNIX systems has grown exponentially.
This legacy means that UNIX systems have retained many of the challenges across the years.
Traditionally users in a UNIX system exist on:
Because of the fragmentation of directory service providers and to eliminate having to compile programs for each provider, Sun Microsystems introduced the NSS facility. It allows programs to access directory services, name services and remote databases in a standard fashion. NSS is very important to understand how Centrify integrates with UNIX systems to provide name services via AD. The configuration for NSS is in the /etc/nsswitch.conf.
Authentication Services on UNIX/Linux
Just like Directory services, authentication in Unix has been performed:
Because of the same needs around NSS, PAM is authentication framework that allow stackable modules implemented as shared objects to perform authentication functions. For example, an account module can verify is the user account is valid, the authentication module can verify the validity of the password, the session module can display a message of the day to the user. Along with NSS, Centrify uses a PAM module to authenticate against Active Directory's Kerberos implementation.
Name Resolution in UNIX/Linux
BIND is the defacto DNS server in UNIX. The client component is controlled typically via the /etc/resolv.conf file.
Privilege Management in UNIX/Linux
Shared Privileged Accounts:
In UNIX, the root account is is king. Aside from being able to impersonate any user, is able to take ownership of any file or process. It is not uncommon (even in mature regulated organizations) to see users abuse the root account. Sometimes even when a commercial solution or sudo is implemented, users will still issue a command to elevate to root. This undermines accountability.
Sharing accounts is generally considered a bad security practice.
 sudo
sudo
sudo is a privilege management utility that allows users to run programs in the security context of another user. It uses the /etc/sudoers file. It is prevalent and reliable.
Commercial Solutions:
There are a number of commercial solutions in the market to tackle the UNIX privilege management puzzle. We will focus on leveraging Active Directory and Centrify-enhanced sudo in this blog. Commercial solution approaches include:
The syslog facility is the main repository for logs, including security events. Interestingly, when using root in a shared account scenario, there are events that are not logged!!!!
Configuration Management on UNIX/Linux
Traditionally, configuration management has been accomplished with scripts written by system administrators, but this approach may not scale depending on the core competency of the company. Companies like AOL, Google and others are pure tech companies and writing software is their core competency; but banks, insurance companies, manufacturing companies, etc may not have the same luxury. Wikipedia has a great article on Configuration Management utilities for UNIX and Linux like Chef, Puppet, etc.
Traditionally UNIX and Linux have separate components for Directory Services, Name Resolution, Authentication, Privilege Management, Accounting and Configuration Management.
Note: I will be referring to the UNIX family of systems (Including Linux) as UNIX throughout this blog.

Directory Services on UNIX/Linux
UNIX Systems have been around for a long time. They have defined and built the Internet as we know it today, so we owe a lot of the benefits that we enjoy to the legacy of UNIX. With the birth of Linux, Open Source solutions and the penetration of virtualization technologies, the family of UNIX systems has grown exponentially.
This legacy means that UNIX systems have retained many of the challenges across the years.
Traditionally users in a UNIX system exist on:
- Locally in the /etc/passwd file
- In a Network Information System (NIS)
- In an LDAP system (like OpenLDAP)
- In commercial solutions and even in Active Directory
Because of the fragmentation of directory service providers and to eliminate having to compile programs for each provider, Sun Microsystems introduced the NSS facility. It allows programs to access directory services, name services and remote databases in a standard fashion. NSS is very important to understand how Centrify integrates with UNIX systems to provide name services via AD. The configuration for NSS is in the /etc/nsswitch.conf.
Authentication Services on UNIX/Linux
Just like Directory services, authentication in Unix has been performed:
- Locally against the /etc/shadow file
- In a Network Information System (NIS) remote shadow file
- Over a Kerberos infrastructure (like MIT Kerberos or Heimdal)
Because of the same needs around NSS, PAM is authentication framework that allow stackable modules implemented as shared objects to perform authentication functions. For example, an account module can verify is the user account is valid, the authentication module can verify the validity of the password, the session module can display a message of the day to the user. Along with NSS, Centrify uses a PAM module to authenticate against Active Directory's Kerberos implementation.
Name Resolution in UNIX/Linux
BIND is the defacto DNS server in UNIX. The client component is controlled typically via the /etc/resolv.conf file.
Privilege Management in UNIX/Linux
Shared Privileged Accounts:
In UNIX, the root account is is king. Aside from being able to impersonate any user, is able to take ownership of any file or process. It is not uncommon (even in mature regulated organizations) to see users abuse the root account. Sometimes even when a commercial solution or sudo is implemented, users will still issue a command to elevate to root. This undermines accountability.
Sharing accounts is generally considered a bad security practice.
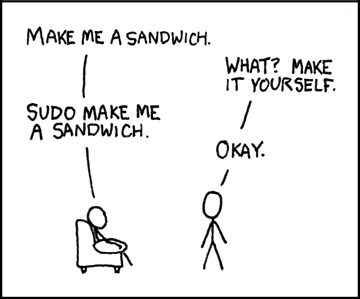
sudo is a privilege management utility that allows users to run programs in the security context of another user. It uses the /etc/sudoers file. It is prevalent and reliable.
Commercial Solutions:
There are a number of commercial solutions in the market to tackle the UNIX privilege management puzzle. We will focus on leveraging Active Directory and Centrify-enhanced sudo in this blog. Commercial solution approaches include:
- Scripting-oriented: Like BeyondTrust's PowerBroker
- Password Vaults: Like Cyber-Ark
- Kernel-level: Like CA's Access Control
The syslog facility is the main repository for logs, including security events. Interestingly, when using root in a shared account scenario, there are events that are not logged!!!!
Configuration Management on UNIX/Linux
Traditionally, configuration management has been accomplished with scripts written by system administrators, but this approach may not scale depending on the core competency of the company. Companies like AOL, Google and others are pure tech companies and writing software is their core competency; but banks, insurance companies, manufacturing companies, etc may not have the same luxury. Wikipedia has a great article on Configuration Management utilities for UNIX and Linux like Chef, Puppet, etc.
Subscribe to:
Posts (Atom)